Should we need to review a backup solution for Office 365? This topic is one of the most frequencies question I hear from my friend. Well, some of you may said can trust Microsoft, they have redundance database to store our data. Even we delete a file in SharePoint or Exchange, Microsoft will give us couple days to recover the data by ourselves. You can check with data retention policy for Office 365 from the link below: https://docs.microsoft.com/en-us/compliance/assurance/assurance-resiliency-and-continuity?view=o365-worldwide
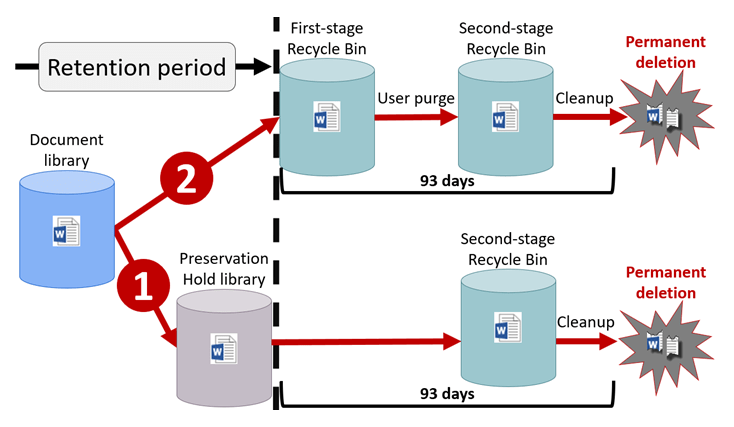

After read the article from Microsoft above, you may said Microsoft already have their retention policy, that is enough. Hmmm… from my end, there is still reasonable for us to find an Office 365 backup solution and we need to keep a copy for our critical data by ourselves. There are couple reasons:
- The data retention policy is not long enough to let us realize we lost the data. (Especially for school, sometime we won’t find the data is lost in real time as we don’t have enough tech person to check all our data.)
- The data is deleted by IT Admin. ( Well, you will never ever know what will happen. But we did see couple similar cases like that)
- Easy to recover the data by ourselves ( Compare with create a ticket and ask for recover the data from Microsoft, we can spend much fewer time to recover the data because it was manage from our end)
I am not sure if you also got this feeling, when everything is fine, sometime the Boss will blame that we you need to spend such lots of budget to order a services which you may never use it. But when we did need to restore a file, your boss will still blame you that why you don’t backup all the data in real time. Base for this, a low cost Office 365 backup solution is what I will share today.
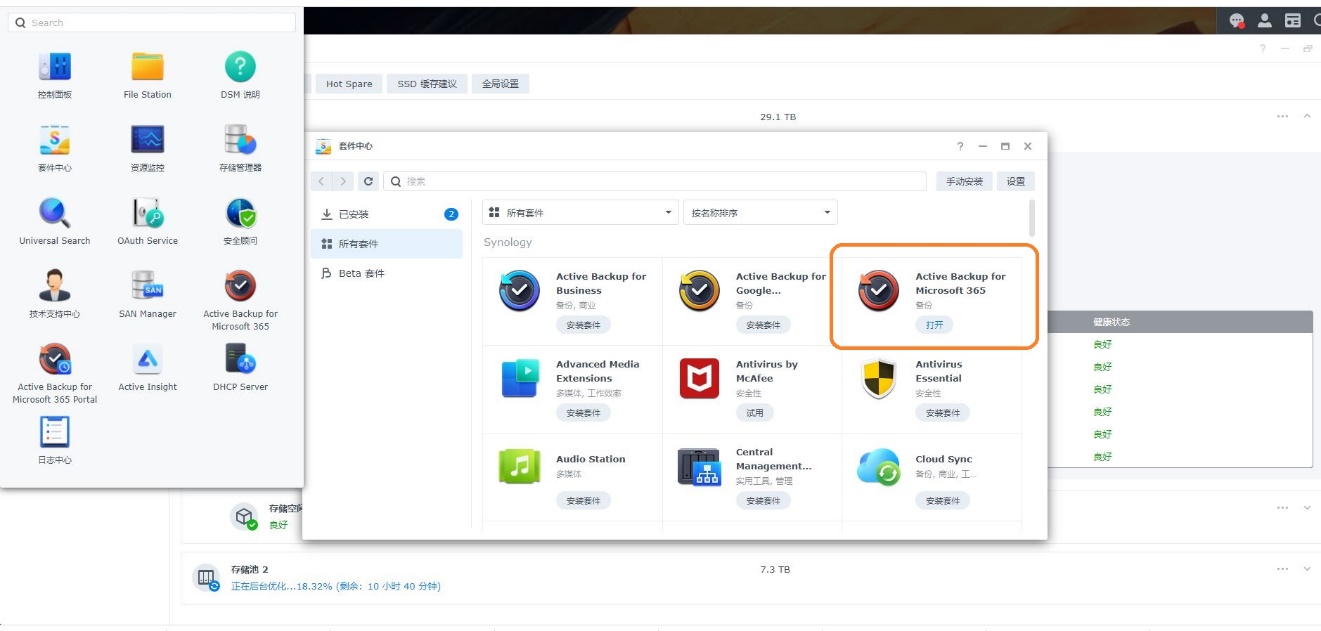
Synology NAS is the most popular NAS devices in the world and there is lots if free plugin we can install on the devices. The NAS and hard drive is just the one time deal business, the plugin is free to use so this solution is fit for school in my mind. Let’s take a look how to setup the backup service for your Office 365 today.
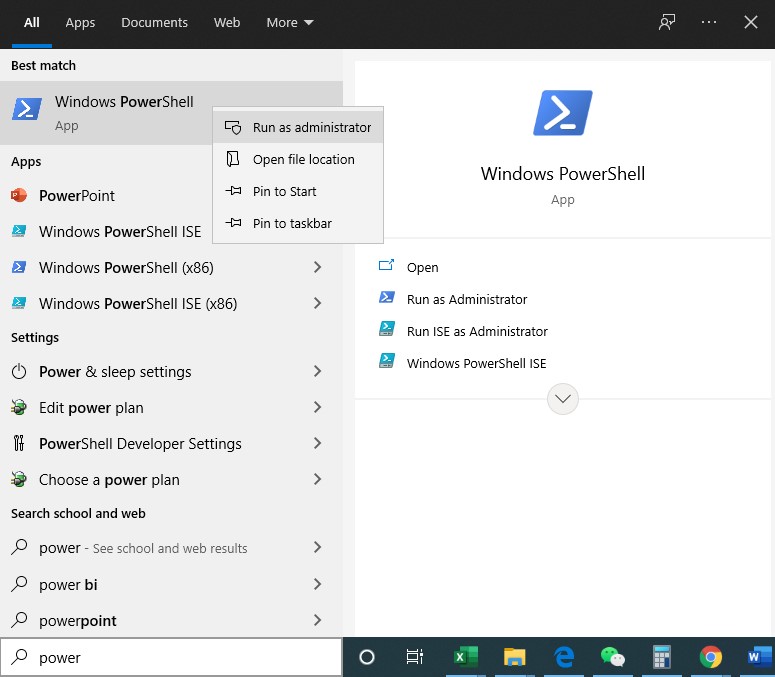
- Login to the NAS and install the application.
2. Check the box and click Next.
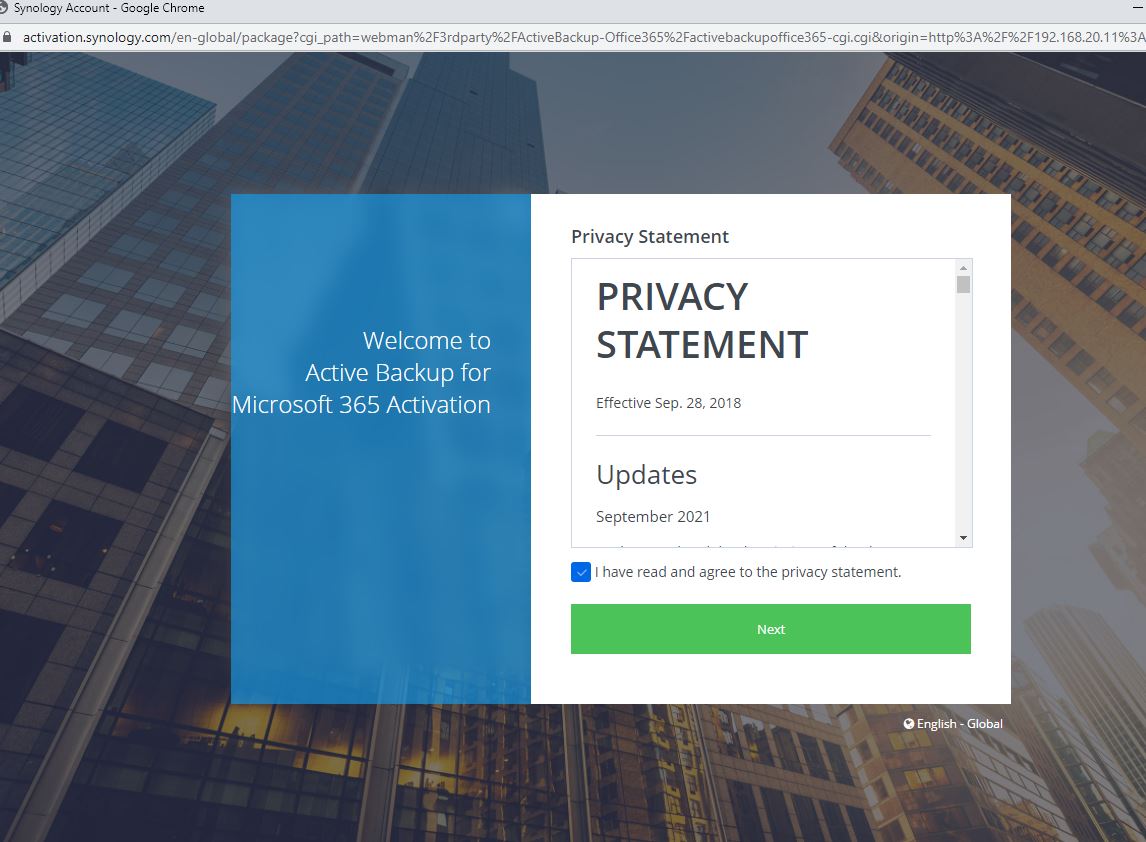
3. Active the plugin. 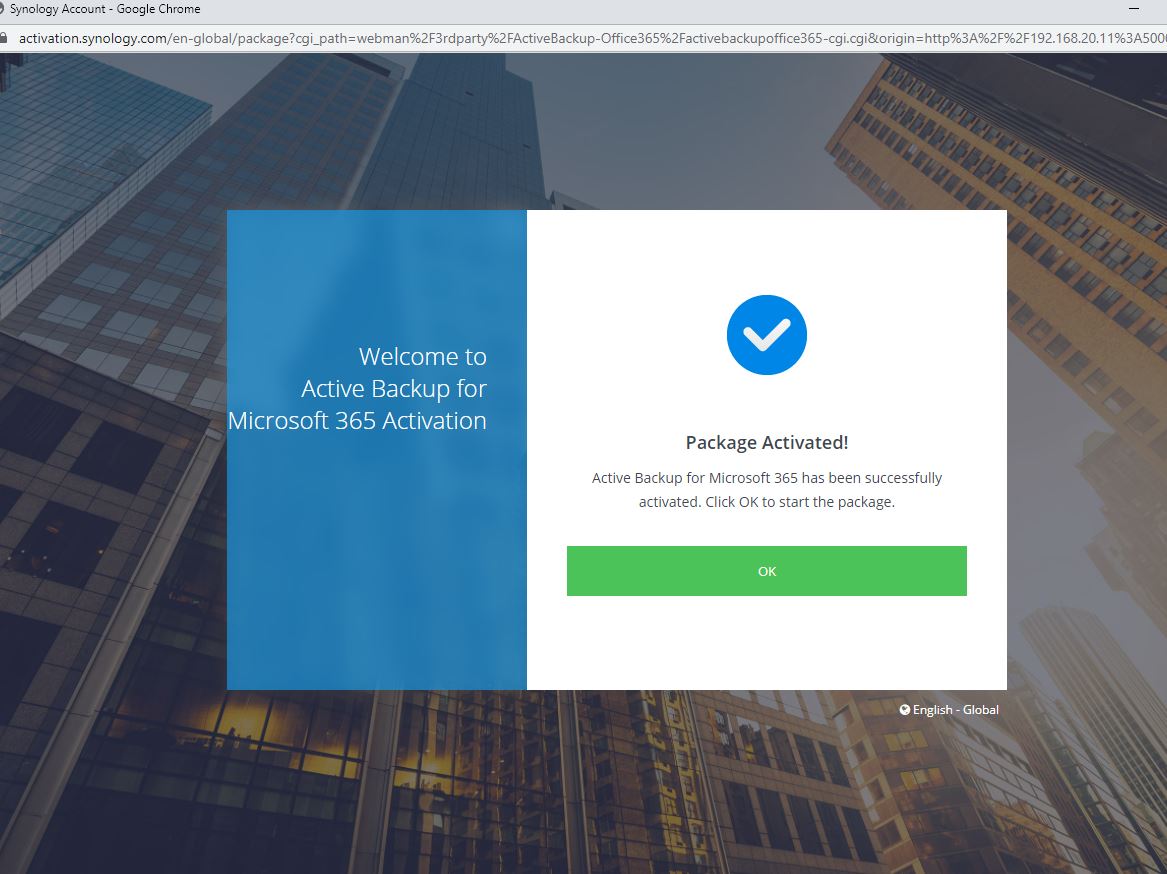
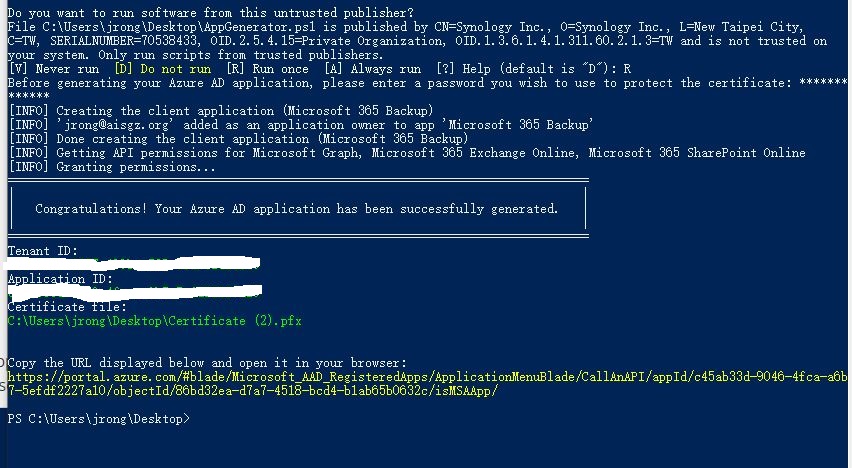
4. Run a PowerShell script to generate a certificate and register an Azure AD application.
5. Run the following script to authorize the script by Synology.
Set-ExecutionPolicy -ExecutionPolicy RemoteSigned -Scope Process
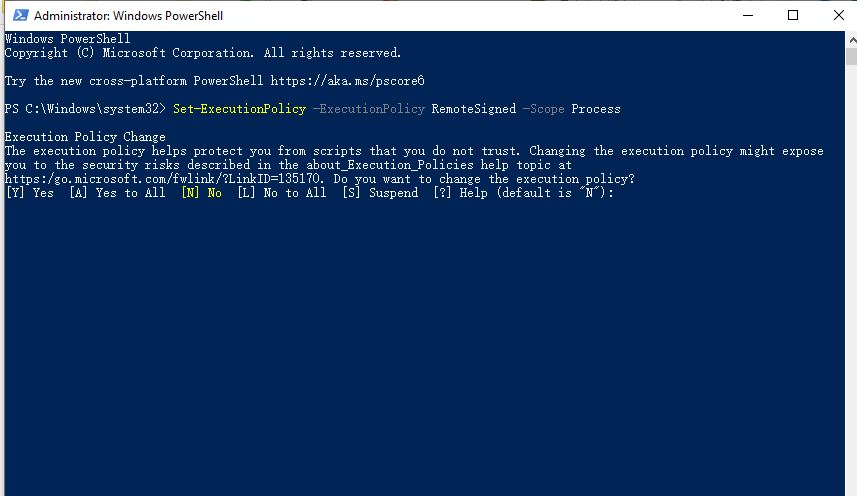
6. Type in “A” to confirm.
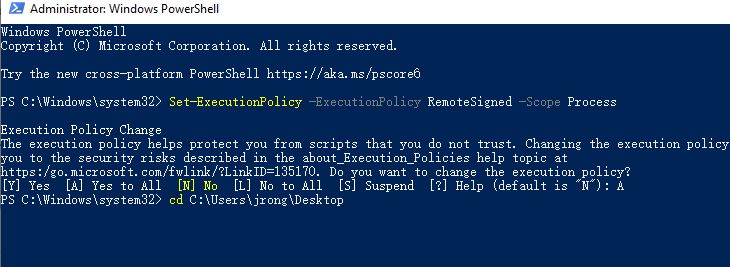
7. Run the .ps1 script export from the Powershell like the screenshot below.
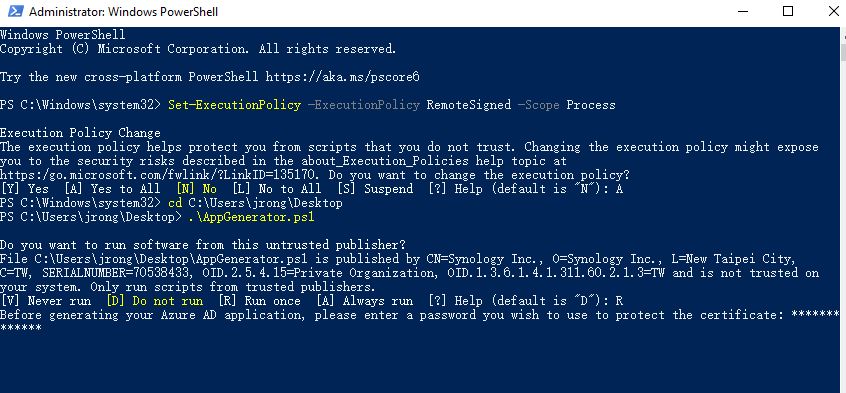
8. Sign in a Office 365 global admin account for the pop up windows.

9. Once the script finishes running, you should be able to see the tenant ID, the application ID, and the certificate file path in PowerShell. Copy them to your Notepad and do not delete the certificate file. They will be used in the following steps.
10. Grant the permission from Azure for your backup application like the screenshot below.
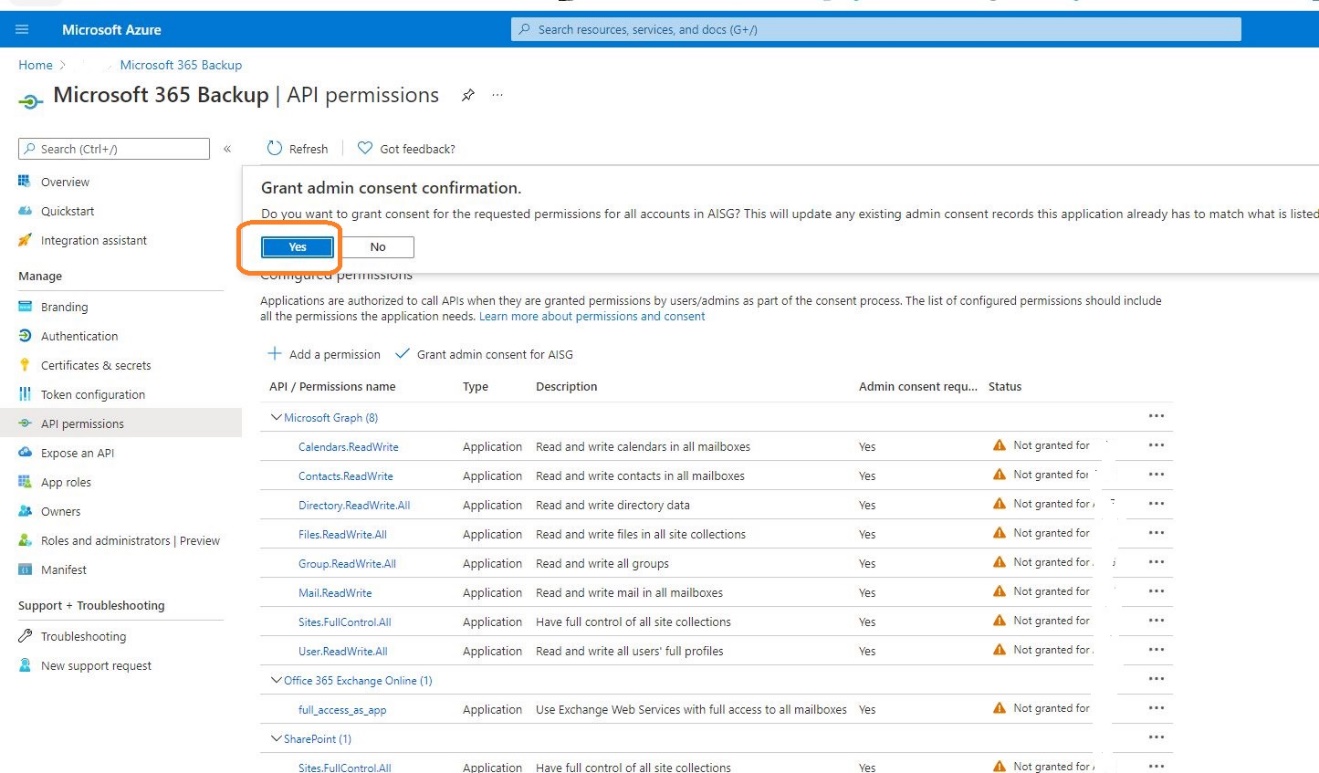
Now, you will got all the backup info you need. Pls make sure the save all the code for step 9 so I can show you how to create a backup task for Office 365 from Synology NAS for my next article.