If you want to ready all my new article at once, feel free to scan the following QR code to follow my wechat account.


Teams allows you to seamlessly make video screencasts or lessons without any of the complexities of traditional methods. You just make your recording. Teams will upload it, compress it and then save a thumbnail in the channel. Students can then click on the thumbnail to watch the video at any time. No heavy lifting!
- If you are going to show a Powerpoint, PDF, web page etc during this session. Open it now.
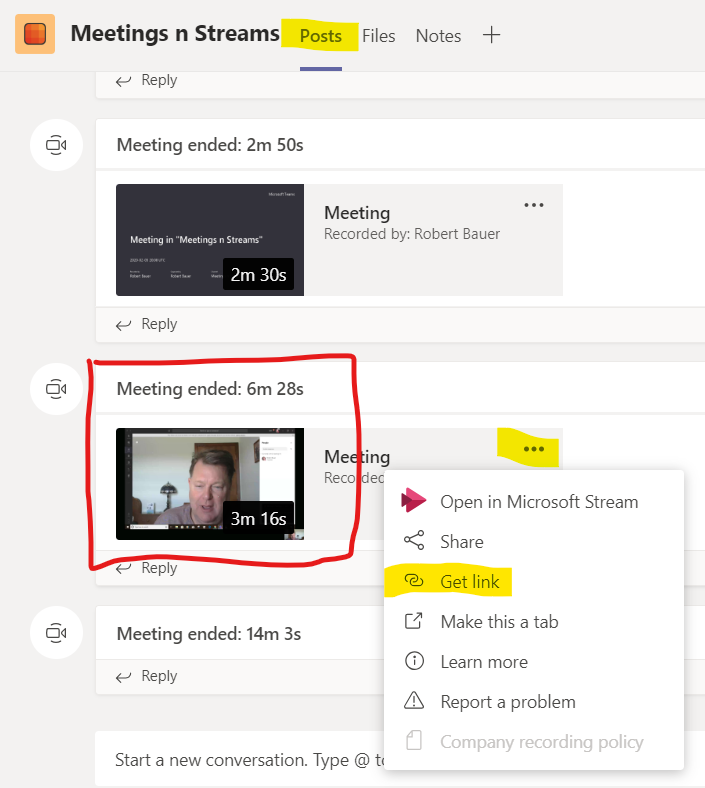
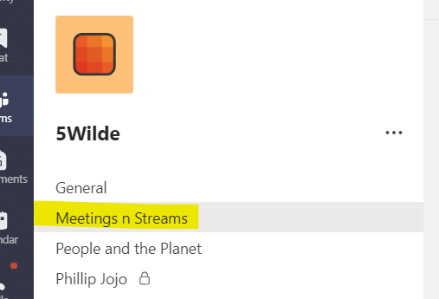
- Start the Teams application (not the web version). Go to the specific class and within that Team click on the channel you want the recording to go into. In this example I created a special Channel called Meetings & Streams. I’m putting all recordings in here and can get the link to each recording later.
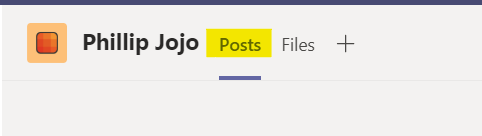
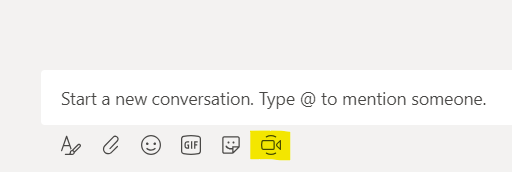
3. In that Channel, click on Posts in the top menu. Then go to the bottom of the window and click the video camera icon.
4. When the window pops up, click Meet now.

5. Once the meeting window opens, look for the share button on the screen. Click it and look for your Powerpoint, PDF, browser or other content you were planning on sharing and narrating.
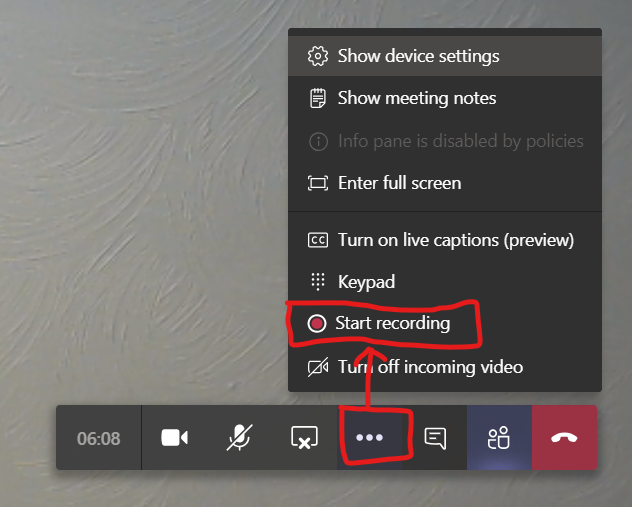
6. With your content now showing, go back to Teams and find the video menu bar. Click “…” and select Start Recording
7. Continue to narrate and flip through the PDF or the Powerpoint. If you want to stop the screen share and just have your face showing, click the X in the screen sharing icon. Or if you are simply finished, just click the red hang up button. you do not have save or upload anything.

8. Wait a few minutes and look in the Channel and Posts. Your recording will be there with a thumbnail to click. Or you can click the “…” and Get Link. This video can only be viewed by students and staff at AISG.